Strip-Repair

Disclaimer: You are using these materials and advice at your own risk

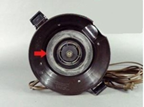
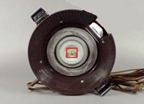
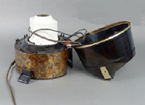
How To Take Apart Motor SE & D4 Units, Remove Motor, and Replace A Power Switch?

1. Remove the separator nut and the separator. If separator is impossible to remove – use some WD40, let it soak for 20-30 minutes and try again. If still no luck – see our instructions on taking apart the motor. Once you take apart the motor to the point where you can grab it by the field or even put the field in a vice – you will be able to remove the nut. When installing back – use only fingers to tighten the nut.
2. Peel off the Rainbow motor gasket slowly, where it gets stuck use large flat screwdriver to scrape gasket loose. In the process you may end up damaging the gasket so it is a good idea to have a gasket spare (Buy One Before You Strip it off).
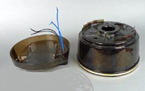
When gluing the gasket back – use Marine Silicone available at most supermarkets. Do not use a glue that will make it impossible to remove gasket without destroying it.
 
3. Use Phillips screwdriver to remove 4 screws holding the Rainbow bottom plate cover
 
4. When you remove the baffle plate you will see 4 bigger screws under it that hold cap and cap cover assembly to the main Rainbow vacuum body.
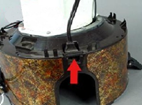
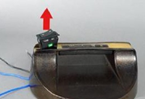
When installing back – switch has to be above the arch in the housing for the water pan neck. Do not over tighten the screws when replacing
5. The cap now will come off the main body
6. lift the power nozzle plug receptacle from its place and the rest of wires will give you enough slack to proceed taking it apart.
7. SWITCH – You will need to cut a cable tie and disconnect all wires.  Wires are plugged into the switch and trip switch itself so you will need to remove the cap cover (step #8).
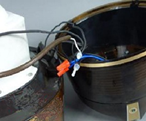
When installing back – after you done connecting the wires use a cable tie to tie all wires together near the closed-end splice or twist on connectors. This will merely eliminate the possibility of an individual wire coming loose.
8. Remove 4 more screws
When installing back – do not attempt to put a new thread in the plastic with the screws. Be careful tightening the screws as plastic may crack.
9. SWITCH – Just like in the picture, but with 6 wires. You will need to pull all wires through the hole in the cap about 12-14 mm. This will be enough to access the Rainbow Power Switch from the bottom. Cut the cable tie and release wires from the switch. It has 6 wires plugged in. Two white and two Red, which go into the power switch. The two blue wires fit into trips witch.
10. Now the switch will come out
When installing back – just push it in and it will snap back in.
11. To Remove Power Cord; Remove metal strain relief clip
12. Remove plastic strain relief clip.
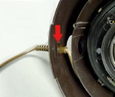
When installing back – make sure you push the cord as far as it may go so clip does not break while attempting to push it on the larger diameter part of the cord.
13. Remove 4 screws and Rainbow motor shroud (motor cover)
When installing back – do not over tighten the screws. Cover should just slightly flatten the rubber but if you keep on tightening cover may crack.
14. Make a note that if you draw the straight line from one latch to another or from front to the back of the unit motor brush holders will be at 45% angle with those lines. You will have to install motor just like that otherwise you may have difficulty installing the cap.
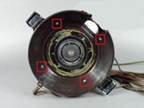
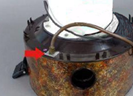
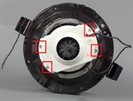
Remove 4 more screws that hold 2 ring segments that hold the rubber motor support ring to the housing.
When installing back – do not over tighten the screws. Ring segments should just slightly flatten the rubber. Keep the motor resting on something so it is lifted of a table and the housing is resting on the motor. Normally motor would just hang of the support ring creating unnecessary tension and making it very hard to align the holes in the ring and the housing..
15. Lift the edges of the rubber motor support ring and motor will come out through the bottom of the housing.
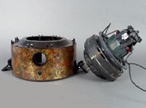
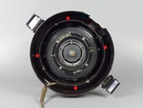
To install the Rainbow motor back into the housing we would suggest to rest it on something so it is a bit raised from the surface you are working on. This will allow the housing to go easily on the motor and hang of of it. Start by situating the motor as it is described in step #20. Pull a portion of the support ring through the housing and then use a flat screwdriver to get the rest of the ring through the opening and over the top of the housing.